Angular 11 프로젝트 #02 - 버튼 만들어보기

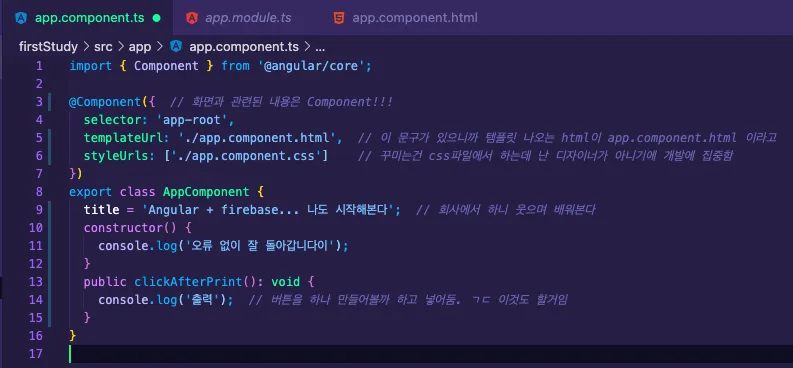
저번 포스트에 이어집니다. 처음 보면, Angular은 기본적으로 html을 기깔나게 꾸며놓는다. 아주 조금만 코드를 변경하고 다시 돌려볼거다. import { Component } from '@angular/core'; @Component({ // 화면과 관련된 내용은 Component!!! selector: 'app-root',// 나중에 불러올때 부를 이름. templateUrl: './app.component.html', // 이 문구가 있으니까 템플릿 나오는 html이 app.component.html 이라고 styleUrls: ['./app.component.css'] // 꾸미는건 css파일에서 하는데 난 디자이너가 아니기에 개발에 집중함 }) export class AppComponent ..
저번 포스트에 이어집니다.
처음 보면, Angular은 기본적으로 html을 기깔나게 꾸며놓는다. 아주 조금만 코드를 변경하고 다시 돌려볼거다.
import { Component } from '@angular/core';

@Component({  // 화면과 관련된 내용은 Component!!!
  selector: 'app-root',	// 나중에 불러올때 부를 이름.
  templateUrl: './app.component.html',  // 이 문구가 있으니까 템플릿 나오는 html이 app.component.html 이라고
  styleUrls: ['./app.component.css']    // 꾸미는건 css파일에서 하는데 난 디자이너가 아니기에 개발에 집중함
})
export class AppComponent {
  title = 'Angular + firebase... 나도 시작해본다';  // 회사에서 하니 웃으며 배워본다
  constructor() {
    console.log('오류 없이 잘 돌아갑니다이');
  }
  public clickAfterPrint(): void {
    console.log('출력');  // 버튼을 하나 만들어볼까 하고 넣어둠. ㄱㄷ 이것도 할거임
  }
}
앞으로 캡쳐랑 코드랑 같이 올려놓겠다. 어차피 중간에 터져서 다시 돌아와서 확인할거같아,,, 벌써 불안해ㅋ
ng serve -o 를 다시 해본다.
- 팁 : 저렇게 페이지를 키고 닫지 않은 채로 vscode에서 코드를 변경하고 변경한 것을 전부 ⌘+S 저장하기를 누르면 알아서 앵귤러 띄워놓은 페이지는 변경사항을 적용해서 리로딩 해줌.
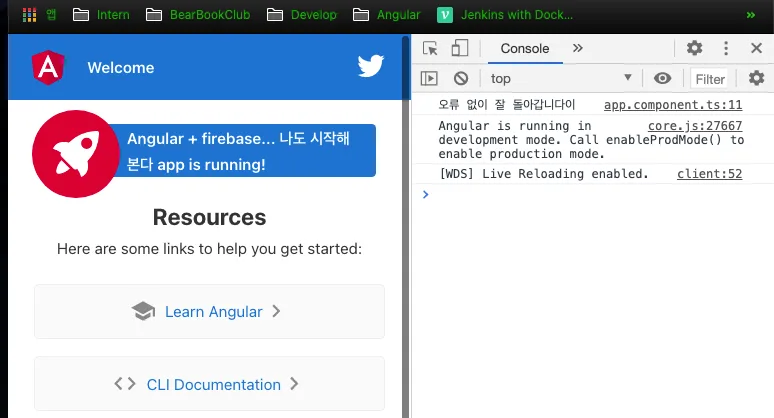
src/app/app.component.html 파일을 수정해보자
일단 앵귤러팀이 열심히 만든 내용들 싸그리 지우고
<button (click)='clickAfterPrint()'>
  {{title}} → Title of Junmannn's Angular Page
</button>
신기하지. 앵귤러에서는 {{ }} 이걸 사용해서 component에서 사용한 데이터 이름을 입력하면 html에 값을 나타낼 수 있음
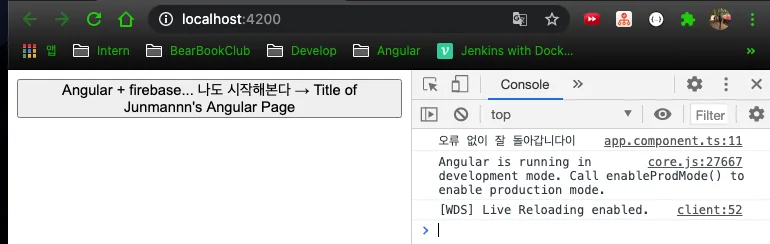
저장을 누르면 곧장 적용됨.
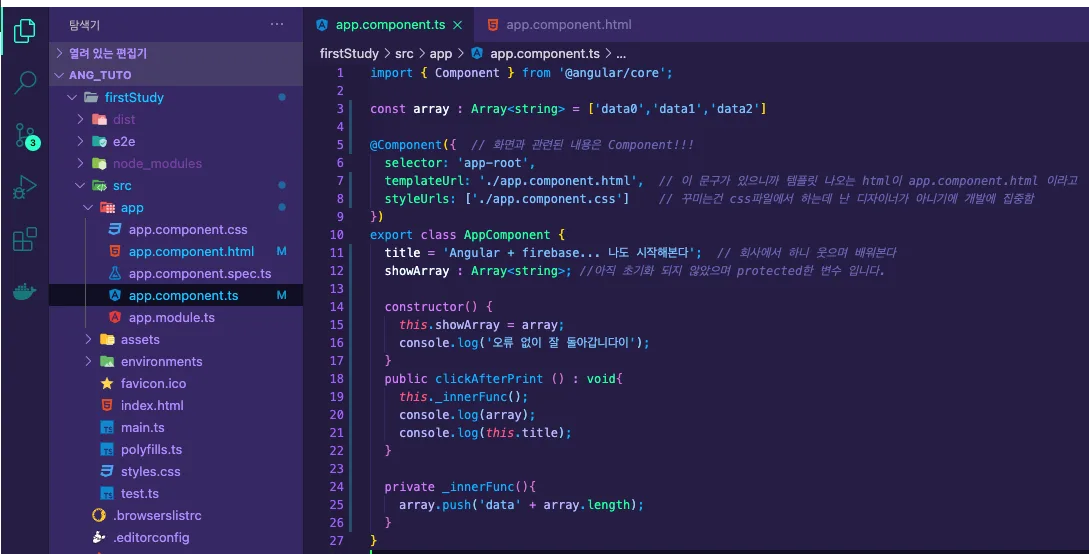
import { Component } from '@angular/core';

const array : Array<string> = ['data0','data1','data2']

@Component({  // 화면과 관련된 내용은 Component!!!
  selector: 'app-root',					// 셀렉터 - 컴포넌트 부르는 이름.
  templateUrl: './app.component.html',  // 이 문구가 있으니까 템플릿 나오는 html이 app.component.html 이라고
  styleUrls: ['./app.component.css']    // 꾸미는건 css파일에서 하는데 난 디자이너가 아니기에 개발에 집중함
})
export class AppComponent {
  title = 'Angular + firebase... 나도 시작해본다';  // 회사에서 하니 웃으며 배워본다
  showArray : Array<string>; //아직 초기화 되지 않았으며 protected한 변수 입니다.

  constructor() {
    this.showArray = array;
    console.log('오류 없이 잘 돌아갑니다이');
    // console.log는 크롬에서 f12 누르면 보이는 console에서만 보이게 하려는거임. 일반 사용자가 보통 안보지
  }
  public clickAfterPrint () : void{
    this._innerFunc();
    console.log(array);
    console.log(this.title);
  }

  private _innerFunc(){
    array.push('data' + array.length);
  }
}
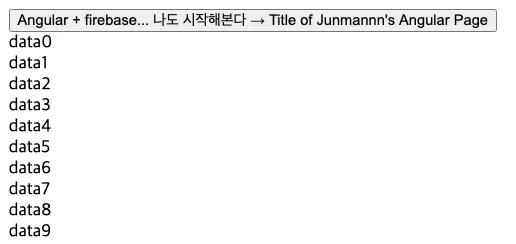
여기서 ngFor 를 처음 접했는데, 반복이라고 보면 됨. 배열에서 보듯.
처음보는데 괜찮은거 같기도 하고 일단 더 이해를 하기 위해서 한 번 응용해서 해봤음
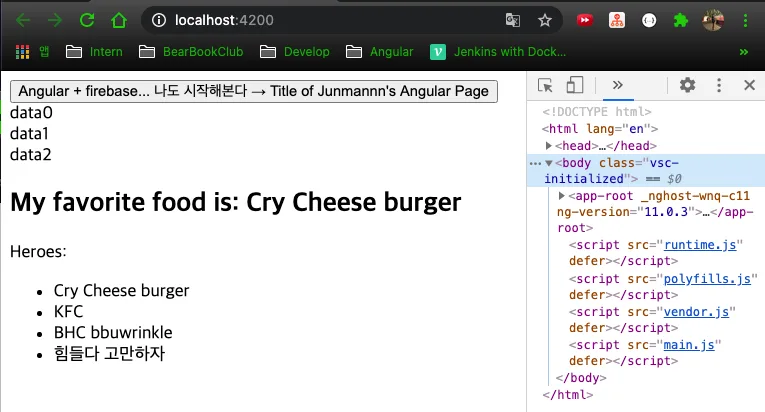
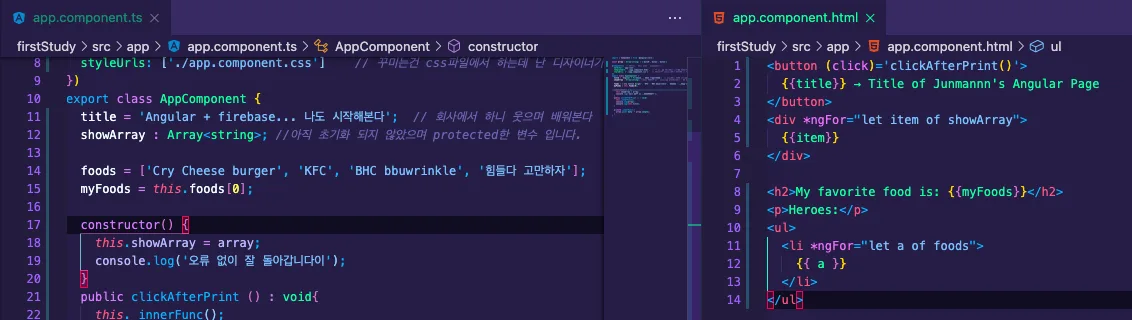
app.component.ts
import { Component } from '@angular/core';

const array : Array<string> = ['data0','data1','data2']

@Component({  // 화면과 관련된 내용은 Component!!!
  selector: 'app-root',
  templateUrl: './app.component.html',  // 이 문구가 있으니까 템플릿 나오는 html이 app.component.html 이라고
  styleUrls: ['./app.component.css']    // 꾸미는건 css파일에서 하는데 난 디자이너가 아니기에 개발에 집중함
})
export class AppComponent {
  title = 'Angular + firebase... 나도 시작해본다';  // 회사에서 하니 웃으며 배워본다
  showArray : Array<string>; //아직 초기화 되지 않았으며 protected한 변수 입니다.

  foods = ['Cry Cheese burger', 'KFC', 'BHC bbuwrinkle', '힘들다 고만하자'];
  myFoods = this.foods[0];

  constructor() {
    this.showArray = array;
    console.log('오류 없이 잘 돌아갑니다이');
  }
  public clickAfterPrint () : void{
    this._innerFunc();
    console.log(array);
    console.log(this.title);
  }

  private _innerFunc(){
    array.push('data' + array.length);
  }
}
app.component.html
<button (click)='clickAfterPrint()'>
  {{title}} → Title of Junmannn's Angular Page
</button>
<div *ngFor="let item of showArray">
  {{item}}
</div>

<h2>My favorite food is: {{myFoods}}</h2>
<p>Heroes:</p>
<ul>
  <li *ngFor="let a of foods">
    {{ a }}
  </li>
</ul>