Angular 11 + firebase(firestore) 프로젝트 #06

저번에 이어서.. 이번에는 상황에 따라 다른 메세지를 띄우는 걸 만들어볼 예정임 login.component.ts import { Component, EventEmitter, Input, OnInit, Output } from '@angular/core'; @Component({ selector: 'app-login', templateUrl: './login.component.html', styleUrls: ['./login.component.css'] }) export class LoginComponent implements OnInit { @Input() logedIn : boolean; // 보내는걸 받을거야 여기서 // app.component.html 파일에서 [logedIn] = 'loginV..
저번에 이어서..
이번에는 상황에 따라 다른 메세지를 띄우는 걸 만들어볼 예정임
login.component.ts
import { Component, EventEmitter, Input, OnInit, Output } from '@angular/core';

@Component({
  selector: 'app-login',
  templateUrl: './login.component.html',
  styleUrls: ['./login.component.css']
})
export class LoginComponent implements OnInit {

  @Input() logedIn : boolean; // 보내는걸 받을거야 여기서
  // app.component.html 파일에서 [logedIn] = 'loginVisible' 한 부분 받는 놈이라고
  @Output() sendMyEvent : EventEmitter<any> = new EventEmitter(); // 얘가 보내는 놈이야

  id :string;
  pwd : string;
  private message;  // 특정 상황에서 우리가 띄워줄 메세지

  constructor() { }

  ngOnInit(): void {
  }

  // id필드에 admin, pw필드에 1234를 친 경우에만 vibile
  tryToLogin() : void{
    if(this.id =='admin' && this.pwd == '1234'){
      alert('signing in...'); // 아이디 비번 잘 쳤으면 로그인 된다고 말을 하고
      this.logedIn = true;
      this.sendMyEvent.emit(this.logedIn);  // app.component에 전달
    }else if(this.id != 'admin'){
      this.setMessage = 'wrong id dude';    // id 틀렸을 때에 메세지 설정
    }else if(this.pwd != '1234'){
      this.setMessage = 'wrong password, try again!'; // 비밀번호 틀렸을때 메세지 설정
    }
  }


  set setMessage(msg) { // 메세지 설정하기
    this.message = msg;
  }

  get getMessage() : any{ // 메세지 가져오기
    return this.message;
  }
}
tryToLogin 함수, 즉 로그인 시도 함수에 변경한 부분을 보자.
if 문에서 set, getMessage를 사용했음. 이거는 하단에 따로 함수를 만들어놨다.
1. @Output() sentMyEvent 를 만들어 Event가 생길시 내용을 보내는 녀석을 만들 것이다.
2. 가장 상단에 priavte 한 message라는 변수를 만들었다. 이제 이 message에 상황마다 이 메세지에 값을 할당해서 띄울거임
3. setMessage( msg ){ } 함수를 만들어 함수의 인자로 들어갈 msg의 내용으로 message의 값을 설정하는 작업이다.
4. getMeaage(){ } 함수를 만들어서 message 변수의 값을 반환하는 함수를 만들고 시작한다.
함수를 보면 우리가 일반적으로 생각하는 getter, setter과 모습이 다르다.
원래같으면 setter에 뭐
public void setMessage( msg) { ... }
public string getMessage() { return message } 이런 식이었겠지만 여기서는 다르다
케이스를 나눴음
- id 입력을 잘못했을 때
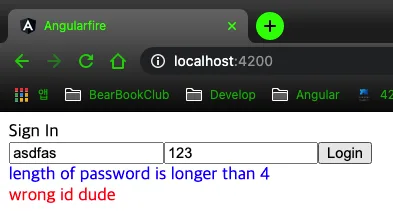
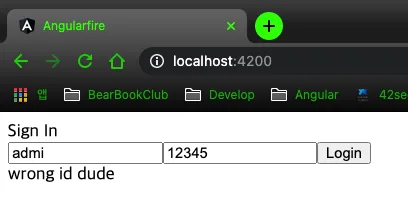
: setMessage 함수를 불러 wrong id 라는 문구로 message 를 설정한다.
- id 는 맞고 pwd 입력을 잘못했을 때
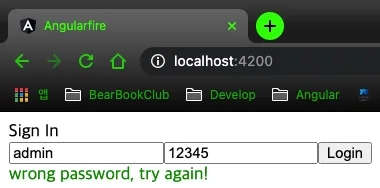
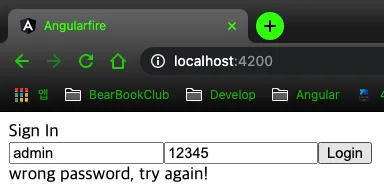
: setMessage 함수를 불러 wrong password 라는 문구로 message를 설정한다.
- 모두 정확히 입력했을 때
: alert( ) 내장함수로 웹페이지에 알림창에 로그인중이라는 문구를 띄우고, logedIn 판단하는 변수를 true로 바꾸고, logedIn 을 sendMyEvent로 내보낸다.
자 그러면 html에서 받고 조금 변경을 해보자
login.component.html
<div>Sign In</div>
<input type="text" placeholder="id" [(ngModel)]="id"/>
<input type="text" placeholder="password"  [(ngModel)]="pwd"/>
<button (click)='tryToLogin()'>Login</button>
<div>
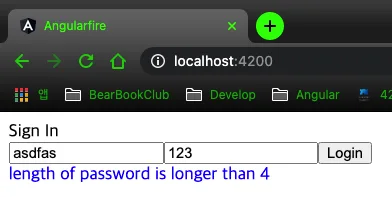
    <span *ngIf="pwd.length < 4"> length of password is longer than 4</span>
</div>
<div *ngIf="getMessage">
    {{getMessage}}
</div>
로그인 버튼 누르는 순간 tryToLogin() 함수를 실행시키라는 문구.
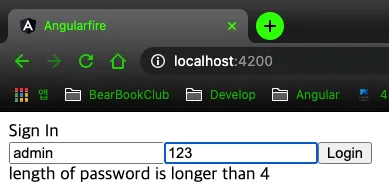
<span>태그는 일단 비밀번호가 4자리 이상을 입력하기 전까진 비번은 4자리 이상임ㅋ 이런 문구를 띄우는거지.
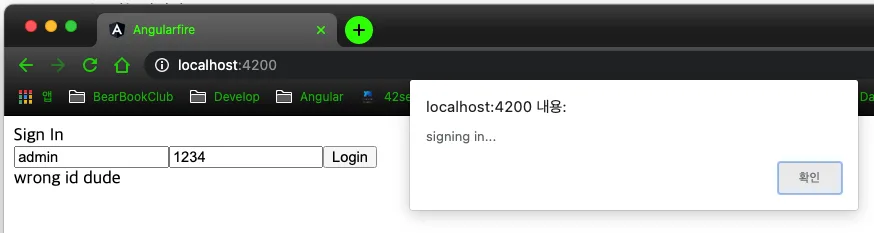
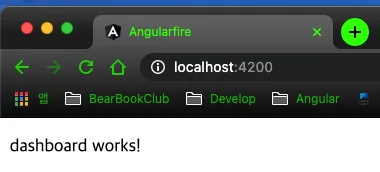
욕심난다 id 틀렸을때랑 pwd 틀렸을때 색상 바꿔보자
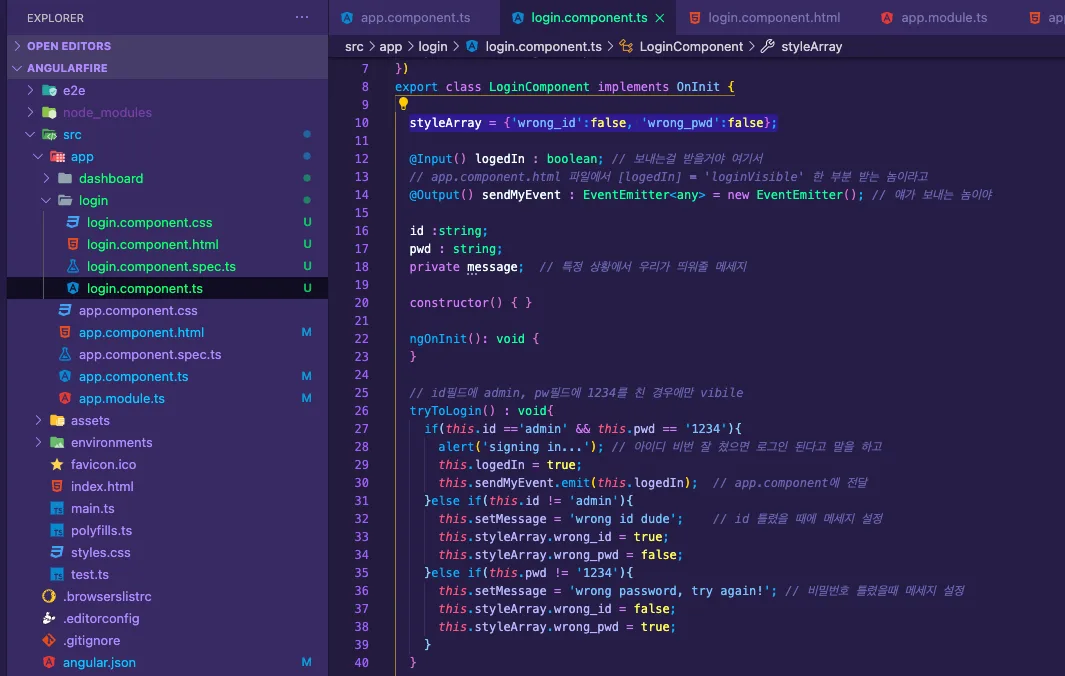
styleArray 라는걸 만들어서 2개를 넣었음. 그리고 tryToLogin 함수에서 변경하도록 했음.음.. ㄱㄷ 코드도 그래도 넣어야겠다
  // styleArray 함수 추가
  styleArray = {'wrong_id':false, 'wrong_pwd':false};

  // 함수 내용 수정
  tryToLogin() : void{
    if(this.id =='admin' && this.pwd == '1234'){
      alert('signing in...'); // 아이디 비번 잘 쳤으면 로그인 된다고 말을 하고
      this.logedIn = true;
      this.sendMyEvent.emit(this.logedIn);  // app.component에 전달
    }else if(this.id != 'admin'){
      this.setMessage = 'wrong id dude';    // id 틀렸을 때에 메세지 설정
      this.styleArray.wrong_id = true;
      this.styleArray.wrong_pwd = false;
    }else if(this.pwd != '1234'){
      this.setMessage = 'wrong password, try again!'; // 비밀번호 틀렸을때 메세지 설정
      this.styleArray.wrong_id = false;
      this.styleArray.wrong_pwd = true;
    }
  }
추가한 부분과 수정한 부분만 넣었음. 이제 너무 길어져서 통으로 넣기가 좀 그러네 맨 마지막에 통으로 넣고 말아야겠다 이제
하여튼, 지금 style에 관련된 변경을 하고 있다. 그렇다면 css지. login.component.css가서 styleArray 추가해주자
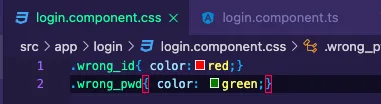
login.component.css
.wrong_id{ color:red;}
.wrong_pwd{ color: green;}
이제 login.component.html에 적용시켜보자

<div>Sign In</div>
<input type="text" placeholder="id" [(ngModel)]="id"/>
<input type="text" placeholder="password"  [(ngModel)]="pwd"/>
<button (click)='tryToLogin()'>Login</button>
<div>
    <span [style.color]="'blue'" *ngIf="pwd.length < 4"> length of password is longer than 4</span>
</div>
<div *ngIf="getMessage" [ngClass]="styleArray">
    {{getMessage}}
</div>
저렇게 span 태그에 직접적으로 [style.color]="'색상'" 해도 됨